However, when you migrate hosting to cloud-like Google Cloud or AWS, then there are a few things that you got to take care of yourself. Backup is one of them! Lately, I moved Geekflare to Google Cloud Platform and was looking for a one-click backup option, but unfortunately, it doesn’t exist. After some research, I learned the backup procedure is slightly different, and I loved it. The good thing is, that you have full control over your backup. There are multiple levels (application, configuration, logs, etc.) of backup, and in the following, I will talk about taking complete VM backup manually and automatically. The term used to take a backup of Google Cloud is called “snapshot.” Some of the advantages of a snapshot.
You can take a snapshot while a disk is attached to the instance – no downtime during backupIt’s differential instead of creating a full disk backup every time – it reduces the backup storage cost and fast operation
Manually using Google Cloud Console
Google cloud console has the option to take a snapshot of the disk, and it is easy.
Log in to Google Cloud and go to Disks under Compute EngineClick on the disk name which is attached to the instance, and you want to take a snapshotClick on “CREATE SNAPSHOT.”
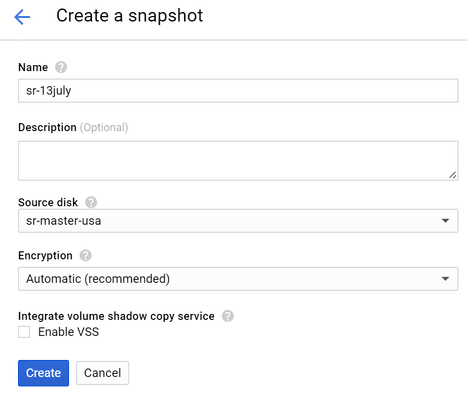
Give the snapshot name and click Create
It will take some time (depending on the disk size), and once done, you will see them in the snapshots section.
This indicates VM disk backup is done. Whenever needed, you can use this snapshot to restore/create a new VM with the same state at the time of VM backup.
Automatically using Scripts
If your application has frequent changes and you would like to automate taking a snapshot regularly, then the following will help you. I found this solution from https://github.com/jacksegal/google-compute-snapshot
Log in to the instance which you want to take auto backupCreate a folder where you want to store the script fileDownload the script file
Change the file permission to be executable
Test the script to ensure it works by manually executing a script
Once confirmed, it works manually, then configure crontab to run periodically
Following example to run daily at 05:00
A script will default and keep the snapshot for the last seven days. If you need to change this schedule, then edit the script file and change the value of OLDER_THAN=7
Automatically using Google Cloud Console
Google recently introduced these features, and I love it. Now, GCP has the option for you to schedule a disk snapshot from the console itself.
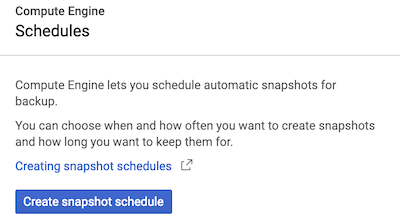
Go to Compute Engine » SnapshotsClick on the Snapshot schedules tab and the following popup will appear. Click Create snapshot schedules
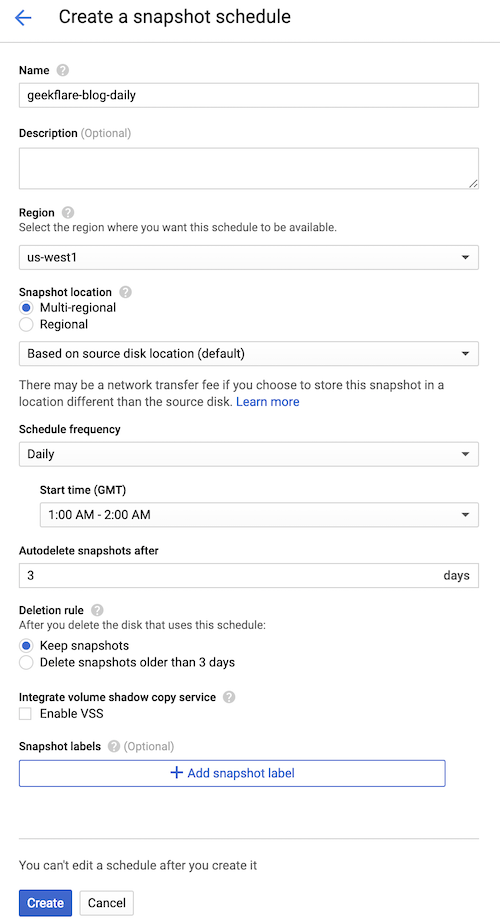
Enter the necessary information and click Create
Let’s explore some of the available options.
Region – select where you want to store your VM snapshot (backup)Schedule frequency – choose how often you want to take a backup from daily, weekly, hourlyStart time – at what time should backup be made? Choose low peak hours.Auto delete snapshots after – how many last snapshots do you want to keep at any time?Deletion rule – what should happen if you delete the source disk (VM)
Once created, you should see them listed. This indicates the snapshot schedule is ready to be attached to the disk.
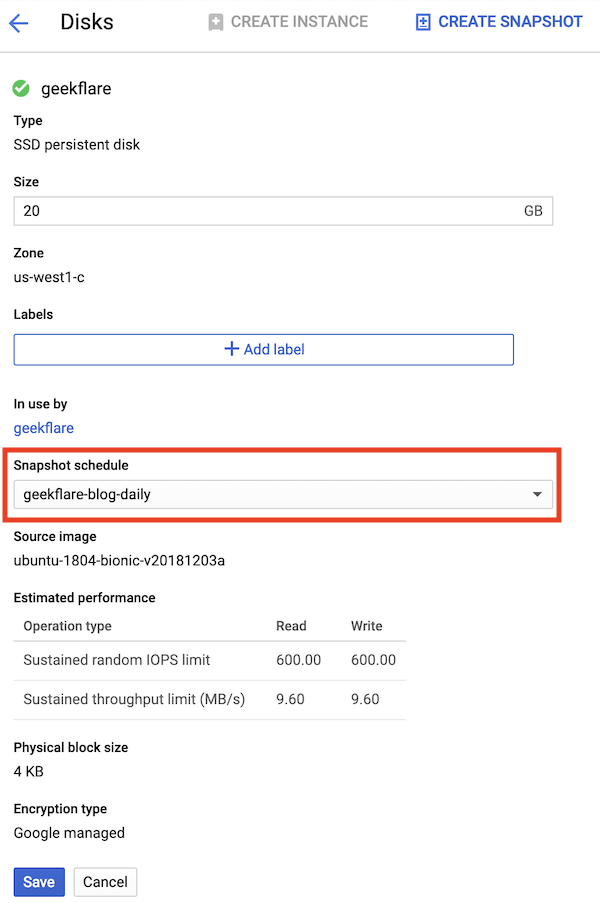
Go to Compute Engine » DisksSelect the disk where you want to enable the snapshotClick edit and select the newly created schedule as shown below.
Click save
That’s all! Google Cloud will take the snapshot based on the schedule. You see, just spending a few minutes to set up a backup can be a lifesaver. On top of the snapshot, you should also consider enabling screenshot, which can help to know the VM state. If you are interested in learning more then check out this GCP certification course.

![]()


